Immediately when you create a new contact, that contact is assigned their own unique portal with an encrypted url.
The portals are RunMags hosted, secure and responsive web pages where your advertisers can view their proposed contracts, eSign them and pay invoices online using their credit card.
Including a portal link in your outgoing proposal emails
To ensure that the correct portal link is sent to each contact, RunMags has placeholders that can be inserted into the email templates. Next we're going to see how this is applied to outgoing proposal emails.
A user with Administrator access can edit the email templates.
Go to Admin >>> System settings
Open the Email templates tab.
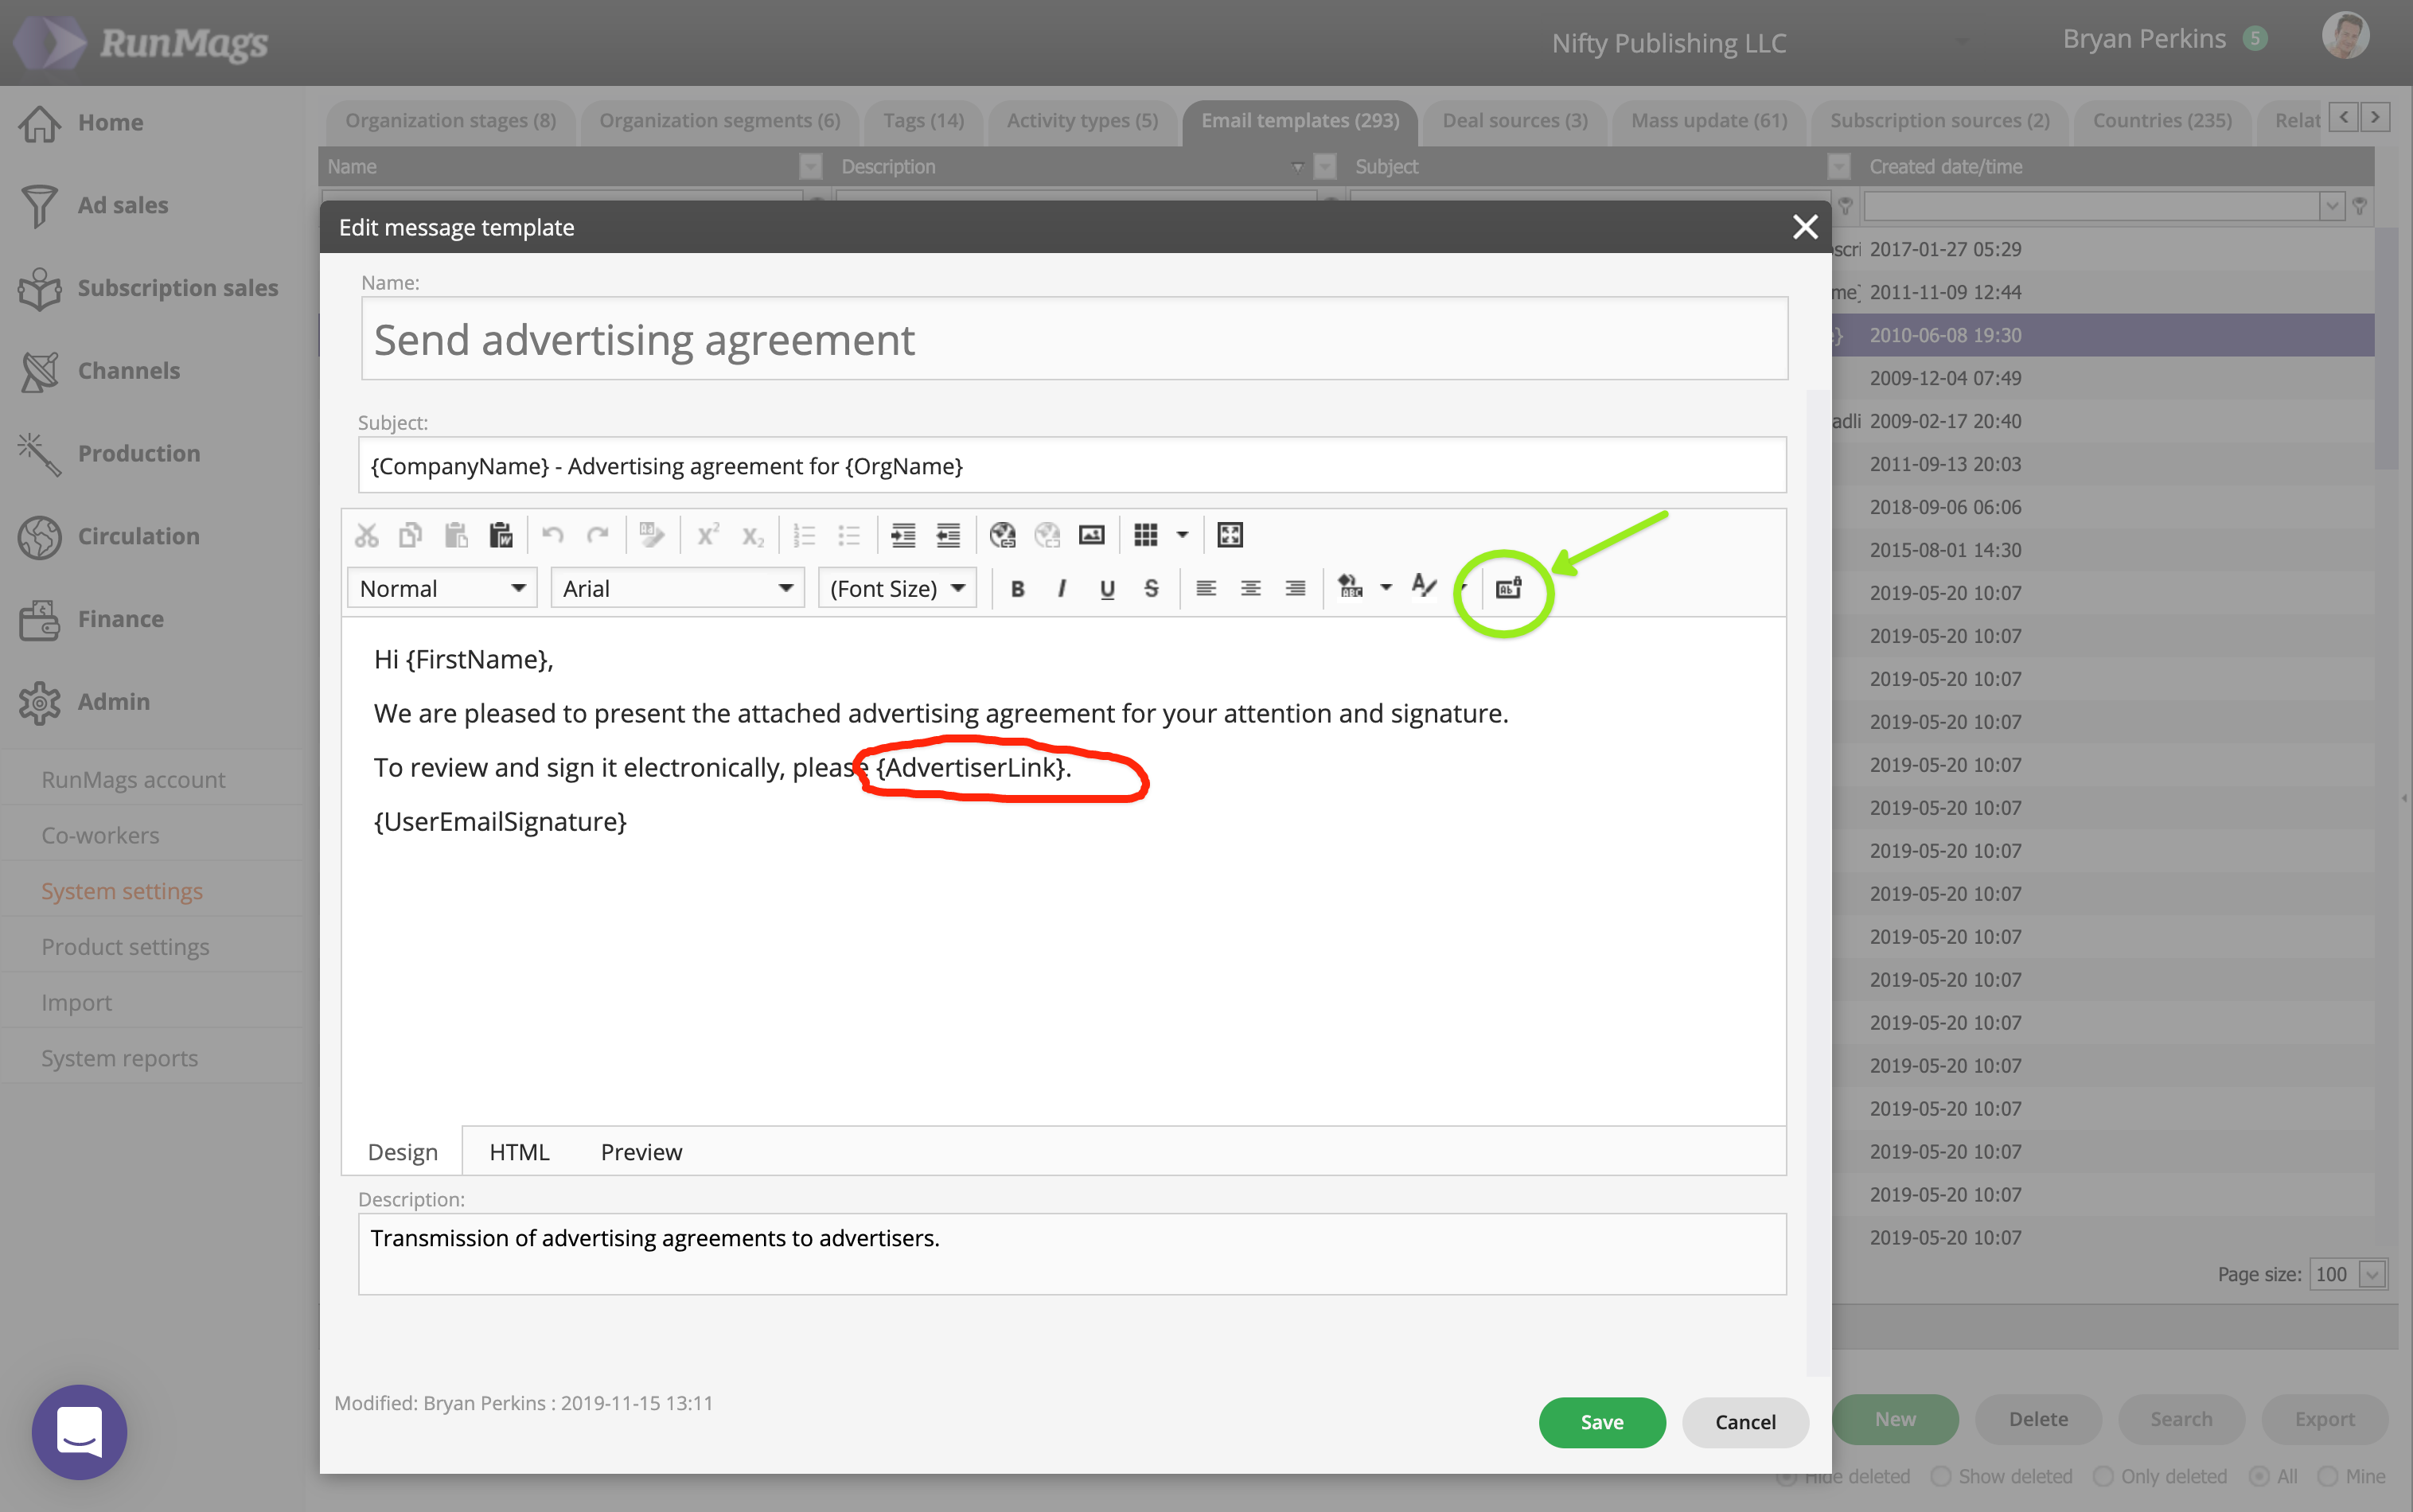
Find the "Send advertising agreement" template and click Edit to open it up.
Out-of-the-box, the "Send advertising agreement" email template is using the {AdvertiserLink} placeholder (see red circle below).
The placeholders can be inserted using the toolbar button (in green below). Simply put your cursor where you want a placeholder, click the button and select which placeholder to insert.
When you are done editing, click Save to save your template.

This specific email template is used to send out proposed contracts to your advertisers. When it is processed the placeholders will be replaced by the matching information. The {AdvertiserLink} placeholder will be replaced by a clickable link with the words "click here".
See this article describing the full client experience. We really recommend you read this article when you are going live with this.
Including a portal link in your outgoing invoicing emails
RunMags uses Stripe as payment provider and this is how you connect your Stripe account to RunMags.
You edit the email template for outgoing invoicing emails in the same way as described above for the proposal emails.
Go to Admin >>> System settings
Open the Email templates tab.
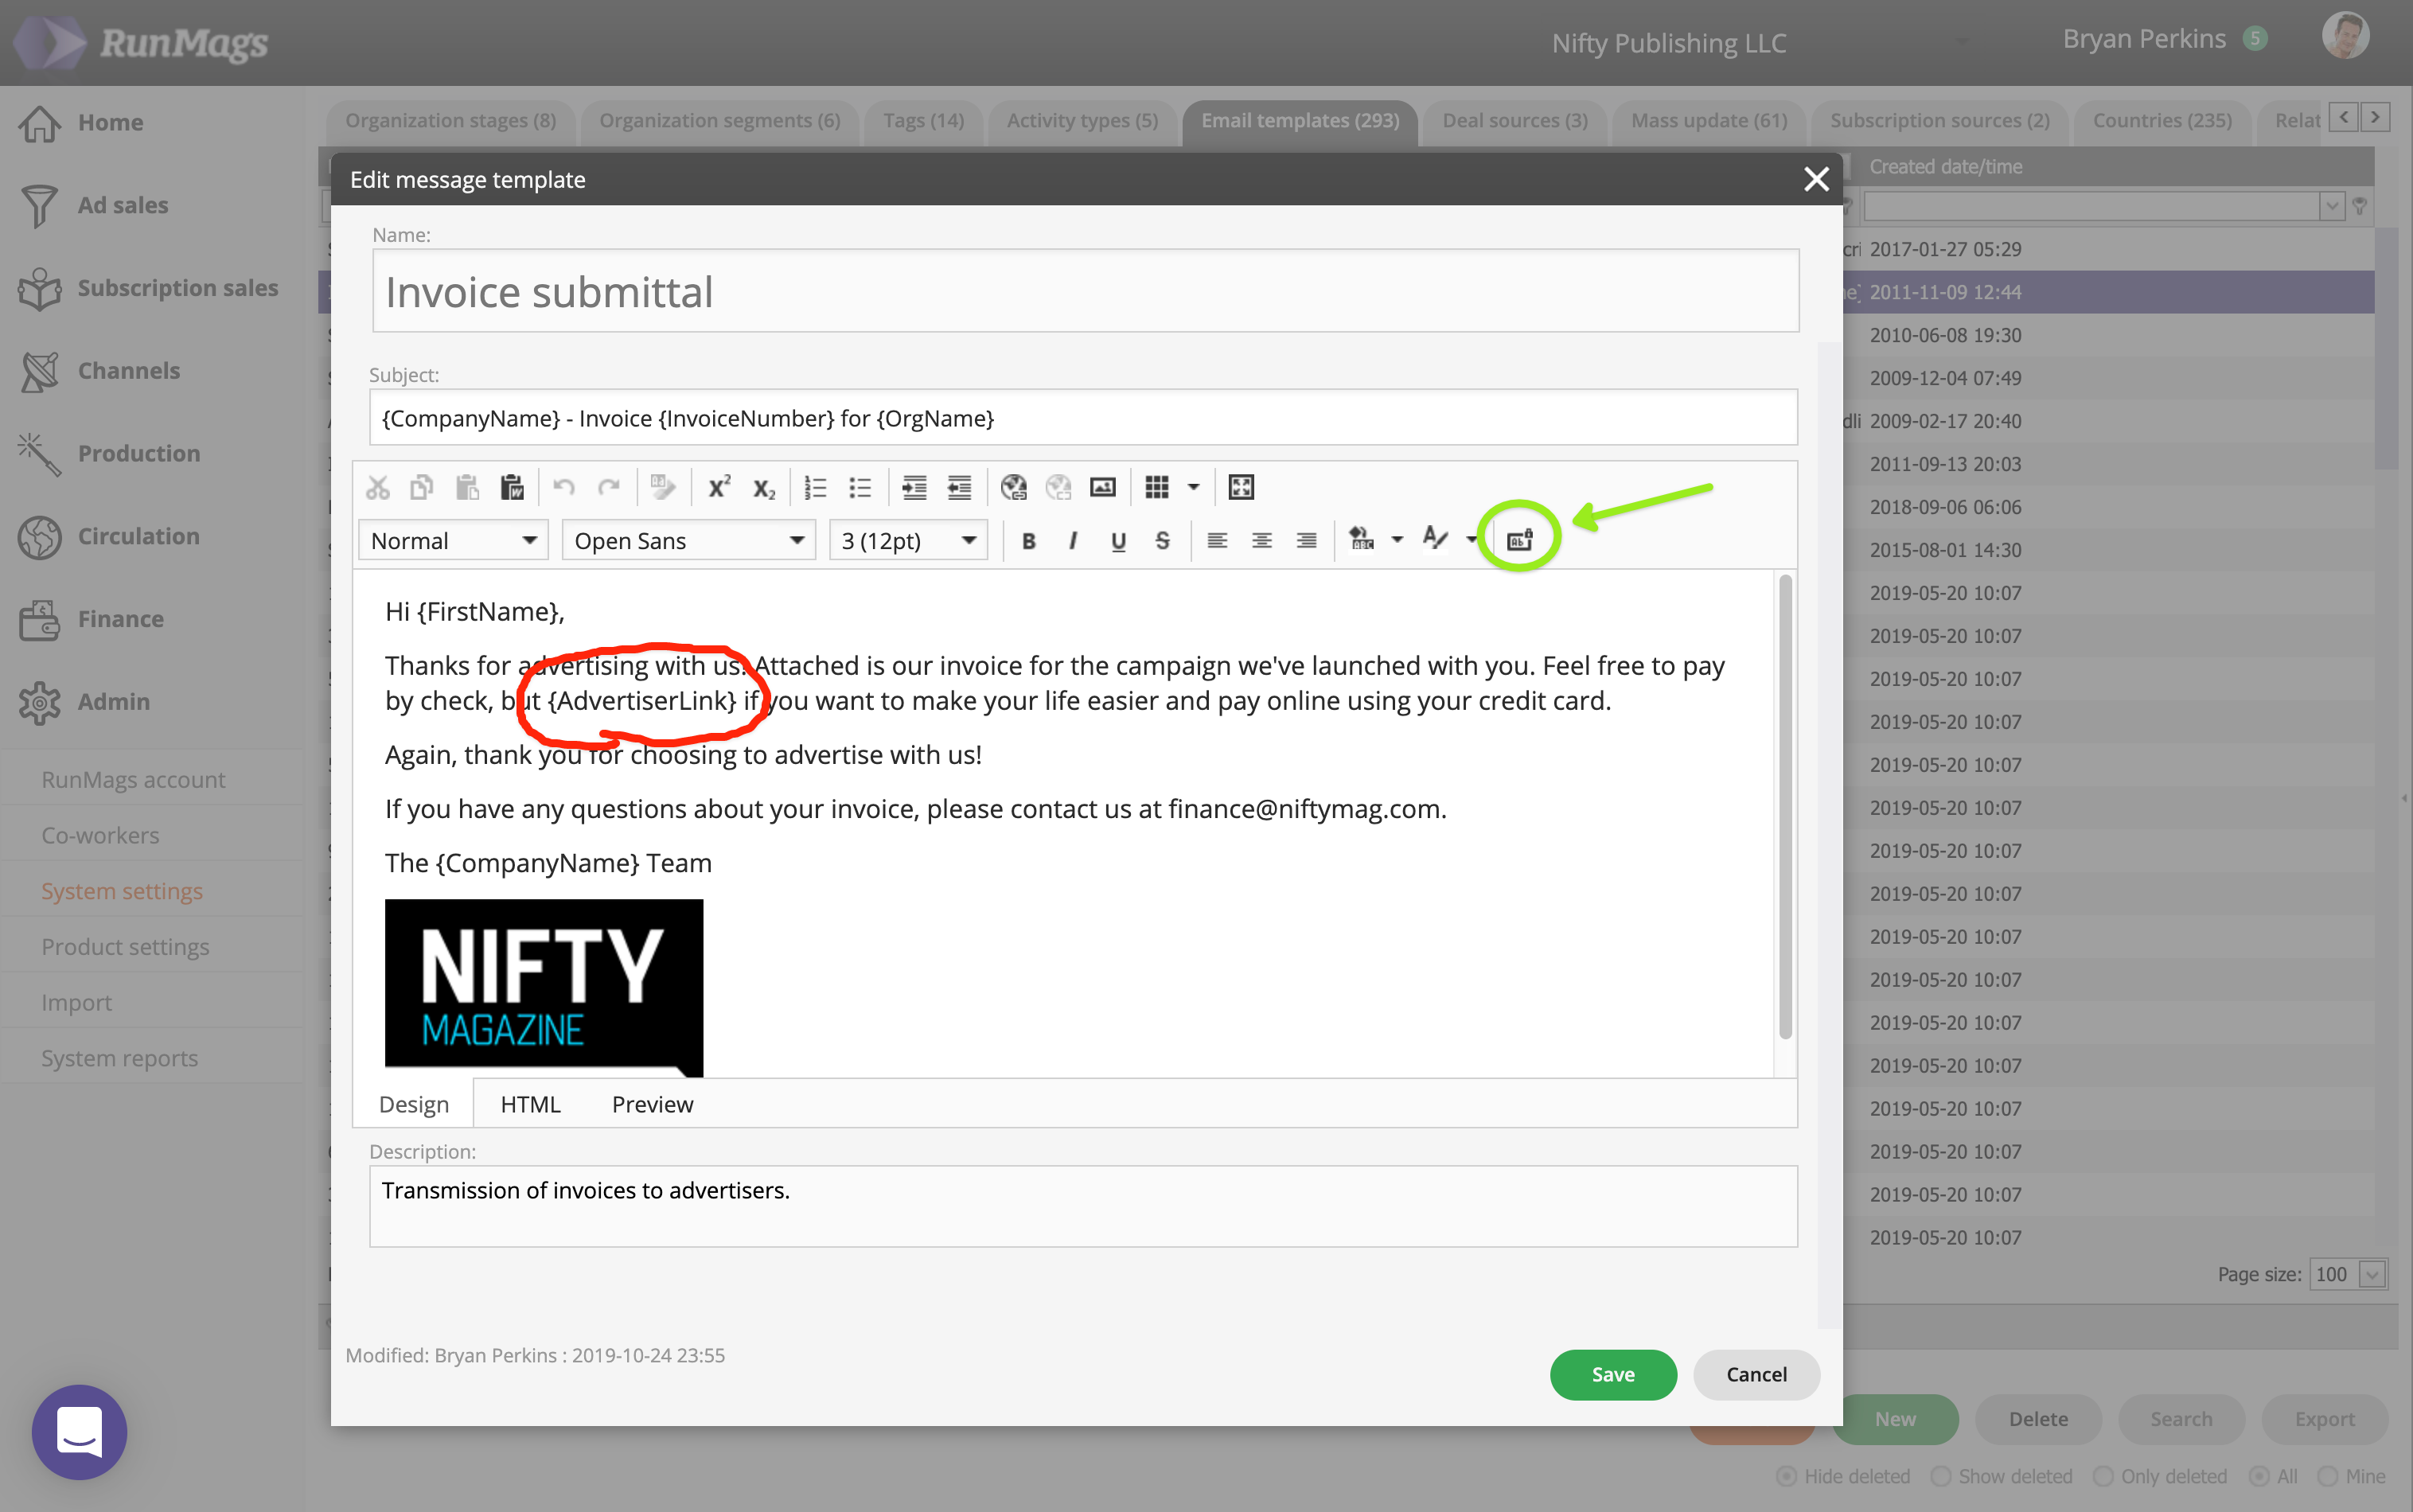
Find the "Invoice submittal" template and click Edit to open it up.
Out-of-the-box, the "Invoice submittal" email template is using the {AdvertiserLink} placeholder (see red circle below).
The placeholders can be inserted using the toolbar button (in green below). Simply put your cursor where you want a placeholder, click the button and select which placeholder to insert.
When you are done editing, click Save to save your template.

See this article describing the full client experience. We really recommend you read this article when you are going live with this.
